Understanding Your Kenmore Gas Oven
Locating the model number can be tricky if scratched off; check parts like the clock or control board for listed part numbers․
AppliancePartsPros․com
is a valuable resource for identifying your specific Kenmore gas oven model‚ aiding in accessing the correct manual and support information․
Locating the Model Number
Finding your Kenmore gas oven’s model number is crucial for accessing the correct manuals‚ parts‚ and troubleshooting information․ Often‚ the model number is affixed to a label or plate within the oven itself․ However‚ as experienced by some owners‚ this label can become scratched or damaged‚ obscuring the complete number․
If the primary label is unreadable‚ don’t despair! A helpful strategy is to look at a part with a part number listed‚ such as the clock or control board․ These components frequently have model numbers associated with them․ You can then input this part number into websites like AppliancePartsPros․com‚ which often displays a list of compatible model numbers towards the bottom of the search results․
Remember‚ even partial information‚ like the last few digits (e․g․‚ 790․36709505 or 79070102400)‚ can be a starting point for identification․ Thoroughly inspect all accessible areas within and around the oven for any remaining traces of the model number․
Decoding the Model Number
Once you’ve located your Kenmore gas oven’s model number‚ understanding its structure can provide valuable insights into the appliance’s features and manufacturing details․ While Kenmore doesn’t publicly detail a universal decoding system‚ the number generally follows a pattern indicating the appliance type‚ size‚ and specific configuration․
Typically‚ the initial digits denote the appliance category (e․g․‚ gas range‚ oven)․ Subsequent numbers often relate to the oven’s dimensions or capacity․ The final digits usually represent a unique identifier for that particular model version‚ including any specific features or design updates․
Knowing the model number allows you to pinpoint compatible replacement parts‚ access detailed manuals tailored to your oven’s specifications‚ and receive accurate support from Kenmore or appliance repair professionals․ Websites like AppliancePartsPros․com utilize these numbers to ensure you find the correct components for your specific Kenmore gas oven․
Safety First: Important Precautions
Prioritize safety by checking for gas leaks and understanding carbon monoxide risks when using your Kenmore gas oven․
Always ensure proper ventilation and follow all safety guidelines․
Gas Leak Detection
Recognizing a gas leak is crucial for safety․ If you suspect a gas leak near your Kenmore gas oven‚ immediate action is necessary․ The distinctive smell of sulfur‚ often described as rotten eggs‚ is intentionally added to natural gas and propane to make leaks detectable․ Never attempt to locate the leak yourself with a flame – this could ignite the gas and cause an explosion․
What to do if you smell gas:
- Immediately evacuate everyone from the home or building․
- Do not operate any electrical switches‚ as a spark could ignite the gas․ This includes lights‚ appliances‚ and even phones․
- Leave the door open while evacuating to ventilate the area․
- From a safe location‚ call your local gas company or 911․ Do not return to the building until a qualified professional has declared it safe․
Regularly inspect the gas supply line connecting to your oven for any signs of damage or corrosion․ If you notice anything concerning‚ contact a qualified technician for inspection and repair․
Carbon Monoxide Awareness
Carbon monoxide (CO) is a colorless‚ odorless‚ and deadly gas produced by the incomplete combustion of fuels‚ including natural gas and propane used in your Kenmore gas oven․ Because it’s undetectable by human senses‚ a carbon monoxide detector is essential for safety․
Install CO detectors on every level of your home‚ especially near sleeping areas․ Ensure detectors are regularly tested and batteries are replaced according to the manufacturer’s instructions․ Recognize the symptoms of CO poisoning: headache‚ dizziness‚ weakness‚ nausea‚ vomiting‚ chest pain‚ and confusion․
If a CO detector sounds‚ immediately evacuate everyone from the home and call 911․ Do not re-enter until emergency personnel have determined it is safe․ Proper ventilation is crucial when using a gas oven; ensure adequate airflow to prevent CO buildup․ Never use your oven to heat your home․

Operating Your Kenmore Gas Oven
Understanding oven controls is key to successful cooking․ Familiarize yourself with the bake and broil functions‚ and learn how to accurately set the oven temperature for optimal results․
Understanding Oven Controls
Kenmore gas oven controls vary by model‚ but generally include knobs or digital displays for setting temperature and selecting functions․ The bake function is used for standard cooking‚ while the broil function provides intense‚ direct heat from above․
Older models often feature simple mechanical controls‚ requiring manual adjustments for temperature and timer settings․ Newer Kenmore Elite stoves boast electronic controls with pre-programmed cooking modes and digital displays for precise temperature management․
Familiarize yourself with the specific layout of your oven’s control panel․ Locate the power button‚ temperature adjustment knobs or buttons‚ function selector (bake‚ broil‚ etc․)‚ and timer settings․ Understanding these controls is crucial for safe and effective operation․ Refer to your specific model’s manual for detailed instructions and diagrams‚ as control layouts can differ significantly․
Pay attention to indicator lights that signal when the oven is preheated or actively heating․ Some models also feature a delay start function‚ allowing you to program the oven to begin cooking at a later time․
Setting the Oven Temperature
Setting the oven temperature on a Kenmore gas oven depends on whether it has manual or digital controls․ For models with knobs‚ simply rotate the temperature control knob to the desired setting‚ typically ranging from 170°F to 550°F․ Ensure the knob clicks firmly into place․
Digital control models allow you to input the temperature directly using the number pad or arrow buttons․ Press the “Bake” function first‚ then use the controls to set the desired temperature․ The oven will begin preheating once the temperature is set․
Always allow the oven to fully preheat before placing food inside․ A preheating indicator light will typically illuminate and turn off when the set temperature is reached․ Accurate temperature setting is vital for successful cooking results․ Consult your recipe for the recommended temperature and adjust accordingly;
Remember to double-check the temperature setting before starting to cook‚ and avoid making adjustments during the cooking process unless necessary․
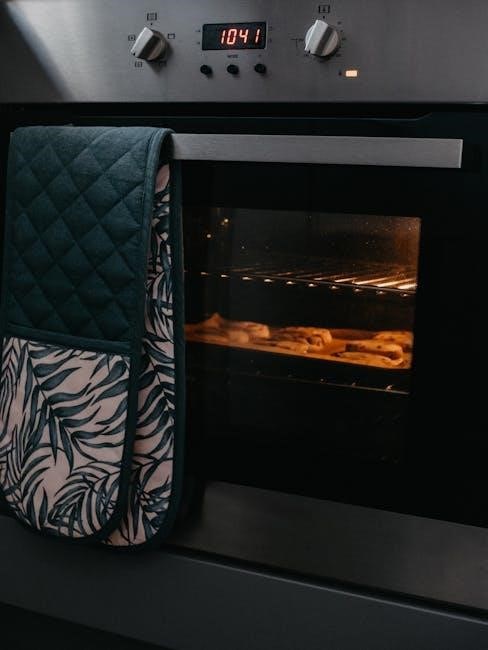
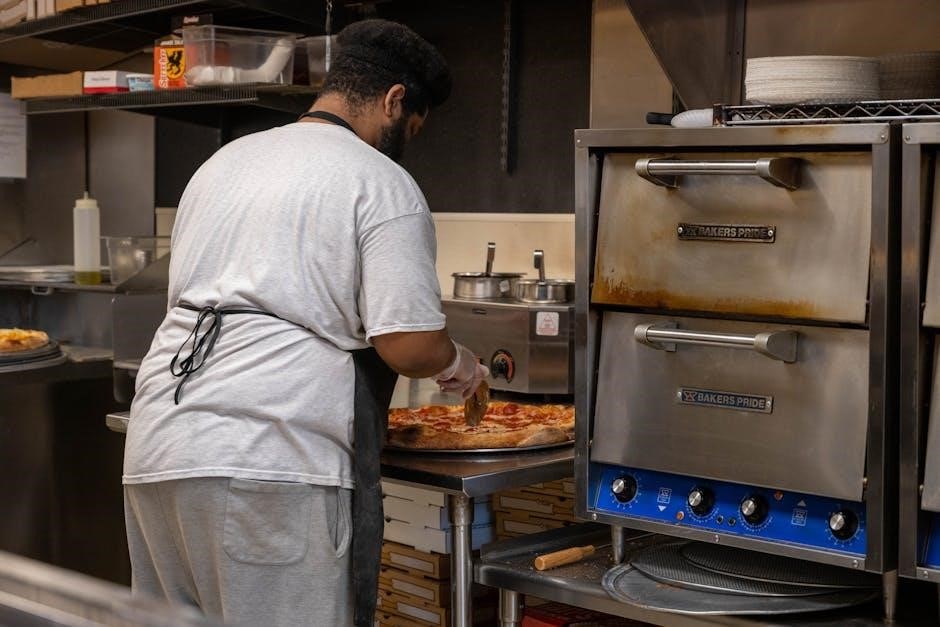
Using the Bake Function
To utilize the bake function on your Kenmore gas oven‚ first ensure the oven is empty of any cookware or food items․ Press the “Bake” button on the control panel; this activates the baking element․ Next‚ set your desired baking temperature using the temperature control knob or digital input‚ as described previously․
Once the temperature is set‚ the oven will initiate the preheating process․ The preheat indicator light will illuminate‚ signaling that the oven is heating up․ Allow the oven to fully preheat before placing your food inside for optimal cooking results․
Carefully place your prepared dish into the center of the oven rack․ Monitor the cooking progress through the oven window‚ and avoid opening the door frequently to maintain consistent temperature․ The bake function is ideal for cakes‚ cookies‚ casseroles‚ and other baked goods․
Always refer to your recipe for specific baking times and temperatures․
Utilizing the Broil Function
The broil function on your Kenmore gas oven provides intense‚ direct heat from the top element‚ perfect for browning and crisping foods․ To activate broiling‚ press the “Broil” button on the control panel․ Select your desired broil setting – some models offer high and low broil options for varying levels of intensity․
Position the oven rack to the appropriate level; typically‚ the highest rack position is best for most broiling applications․ Place your food on a broiler pan‚ ensuring it’s not too close to the heating element to prevent burning․
Important safety note: Broiling generates significant heat and smoke․ Keep the oven door slightly ajar during broiling to vent excess heat and monitor the cooking process closely․ Never leave the oven unattended while broiling․
Broiling is excellent for meats‚ poultry‚ and vegetables‚ creating a delicious‚ caramelized finish․
Troubleshooting Common Issues
Common problems include the oven not heating‚ igniter malfunctions‚ or displaying error codes like F2-E0‚ often indicating a control board issue requiring attention․
Oven Not Heating
If your Kenmore gas oven isn’t heating‚ several factors could be at play․ First‚ ensure the gas supply is active and the oven is properly connected․ A faulty igniter is a frequent culprit; it needs to glow and ignite the gas․ If the igniter clicks but doesn’t glow‚ it’s likely worn out and requires replacement (part number 5303935066 is often cited)․
Check the oven’s safety valve – it prevents gas flow if it doesn’t detect a pilot light or proper ignition․ A malfunctioning control board can also prevent the oven from heating‚ as seen with the F2-E0 error code reported in online forums․ Before attempting repairs‚ always disconnect the gas supply and electricity to the oven for safety․ Consult online resources like AppliancePartsPros․com for diagnostic videos and further assistance․ Remember‚ professional help is recommended if you’re uncomfortable with gas appliance repairs․
Igniter Problems
A common issue with Kenmore gas ovens is a failing igniter․ The igniter’s job is to glow and ignite the gas‚ initiating the baking process; If it clicks repeatedly but doesn’t glow‚ or glows weakly‚ it’s likely nearing the end of its lifespan․ Replacement is often necessary‚ with part number 5303935066 frequently mentioned as a compatible option․
Before replacing‚ verify the igniter is receiving power․ A multimeter can help determine if voltage is reaching the component․ If power is present but the igniter still fails‚ replacement is confirmed․ When installing a new igniter‚ ensure it’s securely mounted and properly connected to the gas valve․ Online resources‚ such as Appliance Repair forums‚ offer guidance on DIY replacement․ Always disconnect power and gas before any repair work‚ prioritizing safety above all else․
Error Codes (e․g․‚ F2-E0)
Kenmore gas ovens utilize error codes to signal malfunctions‚ aiding in diagnosis and repair․ A frequently reported code is F2-E0‚ often indicating a potential issue with the oven’s control board․ This doesn’t automatically confirm a faulty board‚ but it’s a strong indicator requiring investigation․
The control board manages various oven functions‚ and an F2-E0 error suggests a communication or operational problem within this system․ Troubleshooting may involve checking wiring connections to the control board and verifying sensor functionality․ Replacement of the control board might be necessary‚ but it’s crucial to confirm the correct model number for compatibility․ Online forums‚ like AppliancePartsPros‚ discuss this error extensively‚ offering user experiences and potential solutions․ Always consult a qualified technician if unsure about proceeding with repairs․

Maintenance and Cleaning
Regular cleaning extends your Kenmore gas oven’s life․ Utilize the self-cleaning cycle‚ or opt for manual cleaning procedures for a sparkling oven interior and optimal performance․
Self-Cleaning Cycle Operation
The self-cleaning cycle on your Kenmore gas oven utilizes extremely high temperatures to burn off food residue‚ eliminating the need for manual scrubbing․ Before initiating the cycle‚ remove oven racks‚ cookware‚ and any loose debris․ Ensure the oven door can lock securely – a crucial safety feature․
Select the self-clean function on your oven’s control panel‚ and choose the desired cleaning duration; options typically range from two to four hours․ The door will automatically lock‚ and the oven will heat to a very high temperature․
Important safety notes: Avoid opening the door during the cycle‚ as this can cause severe burns․ The oven and surrounding areas will become very hot․ After the cycle completes and the oven cools‚ a small amount of ash may remain‚ which can be easily wiped away with a damp cloth․ Always ensure adequate ventilation during and after the self-cleaning process․
Manual Cleaning Procedures
For regular maintenance‚ manual cleaning is essential even with a self-cleaning oven․ Begin by ensuring the oven is cool․ Remove racks and soak them in warm‚ soapy water․ Prepare a cleaning solution of baking soda and water to form a paste – this is a gentle yet effective cleaner․
Apply the paste to the interior surfaces‚ avoiding heating elements and the gas burner․ Let it sit for at least 20-30 minutes to loosen grime․ Then‚ using a damp sponge or cloth‚ scrub the interior‚ focusing on stubborn areas․
For baked-on residue‚ a plastic scraper can be helpful․ Rinse thoroughly with clean water‚ removing all traces of the cleaning solution․ Dry the interior with a clean cloth before replacing the racks․ Regularly wiping up spills immediately prevents buildup and simplifies future cleaning efforts․
Replacing the Oven Igniter (Part Number 5303935066)
Replacing the oven igniter (part number 5303935066) requires caution․ Always disconnect the gas supply and electricity before starting․ Locate the igniter within the oven’s burner assembly – typically at the bottom․ Carefully remove the old igniter‚ noting the wire connections for correct reassembly․
Install the new igniter‚ ensuring it’s securely positioned and the wires are properly connected․ Double-check all connections before restoring power and gas․ A faulty igniter prevents the burner from lighting‚ leading to oven failure․
Appliance Repair resources offer detailed guides and videos demonstrating this process․ If you’re uncomfortable with this repair‚ consult a qualified appliance technician․ Proper installation is crucial for safe and efficient oven operation․ Remember safety first!
Conversion Kits & Fuel Type
Converting from LP to natural gas requires a specific conversion kit․ Ensure the kit is compatible with your Kenmore Elite stove model (e․g․‚ 790․36709505) for safe operation․
Converting from LP to Natural Gas
Converting your Kenmore gas oven from Liquefied Petroleum (LP) gas to natural gas is a task requiring careful attention to detail and adherence to safety guidelines․ It’s crucial to obtain the correct conversion kit specifically designed for your oven’s model number – like the Kenmore Elite 790․36709505 – to ensure proper functionality and prevent potential hazards․
The conversion process typically involves replacing several key components․ These include the gas valve‚ burner orifices‚ and potentially the pressure regulator․ The LP gas system operates at a different pressure than natural gas‚ necessitating these changes․ Always shut off the gas supply before beginning any work on the oven․
Detailed instructions should accompany your conversion kit․ These instructions will guide you through each step‚ including identifying the correct parts and properly installing them․ If you are uncomfortable performing this conversion yourself‚ it is highly recommended to consult a qualified appliance technician․ Improper installation can lead to gas leaks‚ carbon monoxide poisoning‚ or damage to your oven․
Double-check all connections after installation and perform a leak test using a soapy water solution․ If bubbles appear‚ there’s a leak that needs immediate attention․

Finding Manuals and Parts
AppliancePartsPros․com offers extensive resources for Kenmore manuals and parts‚ while the Kenmore Support Website provides direct access to documentation and assistance․
AppliancePartsPros․com Resources

AppliancePartsPros․com stands as a premier online destination for Kenmore gas oven owners seeking manuals‚ parts‚ and troubleshooting guidance․ Their platform allows users to input partial model numbers – even those with missing digits – to narrow down potential matches․
The site’s extensive database often displays a list of compatible models when a complete number is unavailable‚ enabling you to identify your oven based on visual similarities and specifications․ Furthermore‚ AppliancePartsPros․com frequently features exploded diagrams illustrating component locations‚ simplifying the identification of needed replacement parts․
Beyond parts‚ they offer detailed repair guides‚ including videos demonstrating procedures like replacing the Oven Igniter (part number 5303935066)․ The forum section provides a community space where users share experiences and solutions to common Kenmore gas oven issues‚ including deciphering error codes like F2-E0․ This collaborative environment can be invaluable when tackling DIY repairs․
Kenmore Support Website
The official Kenmore support website serves as a direct resource for locating owner’s manuals specific to your gas oven model․ While finding the manual can be challenging if the model number is obscured‚ Kenmore’s site often provides search functionalities based on appliance type and features․
Direct access to downloadable PDFs of user manuals is typically available‚ offering comprehensive instructions on operation‚ safety precautions‚ and maintenance procedures․ The website may also host FAQs addressing common issues and troubleshooting steps․
Furthermore‚ Kenmore’s support portal often includes contact information for their customer service team‚ allowing you to request assistance in identifying your model or obtaining a replacement manual․ Although the initial search might require patience‚ leveraging Kenmore’s official resources ensures you receive documentation tailored to your specific appliance‚ aiding in safe and effective operation and repair․
No Responses